| Dangerspouse Rides Again |

Garage - Track
 
|
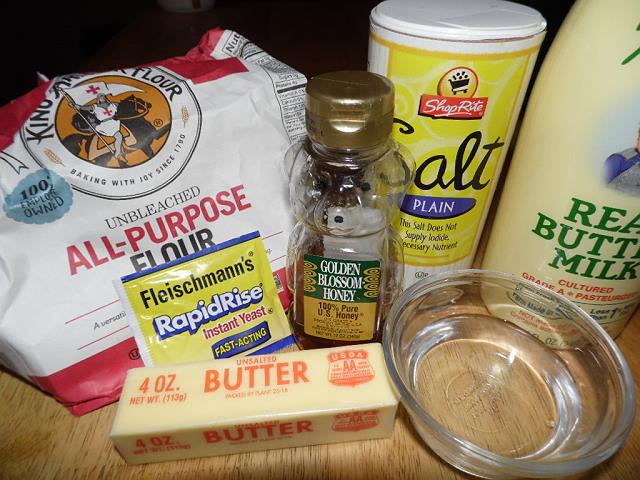
Feb. 04, 2018 - 6:16 p.m. Loafing I had fully intended to post some ribald bit of fluff today as an antidote to yesterday's stultifying tl:dr pudding episode. But some odious creature took me to task for not first posting the bread recipe I apparently promised I would. God, I hate people with functioning memories. Fine. Here's your stupid bread post. Ok first, let's get one thing straight. The recipe I'm posting here is not for some artisan loaf that "Chez Boulanger" would be proud to serve for $17 per slice. It's for a no-frills everyday white sandwich loaf, commonly known as "American bread", ~ $.03/slice. If you ARE looking to make the kind of bread that would make even a Frenchman like you, you want to head over to Bewitching Kitchen. SallyBR (aka "The Iron Uptake Chef") is an actual, bona fide, no kidding, "just like Dexter's Lab!" working research scientist. And she applies her anal-retentive mania for exactness - necessary in her profession - to her cooking passion as well. Her breads particularly. She's one of those (BTW, I've been making her 'Bolo de Fuba' on a regular basis since she first printed the recipe seven years ago. That's a record for me. It is - she is - that good.) Enough brown nosing. Here we go. I did something this time that I rarely do when making bread: I measured the ingredients. I normally just pour some flour and yeast into a bowl, then enough add liquid and some kind of sugary stuff til it feels like dough (sorry, Sally). But that doesn't translate very well to internet instruction, so I went back and looked for the notes I made when I first started making this recipe around 20 years ago. I also timed everything out. When I last harangued people to start making their own bread I noted it could be done in two hours start to finish. That was a guess. This time it's not. I did this in just under a deuce. You can too. See for yourself: Basic American White Bread Mise en place: 1 c. Milk (yes, that's a bottle of buttermilk in the pic. I was out of milk so I used what I had: 2/3 buttermilk, 1/3 half and half here. You can just use milk.) 3 1/2 c. flour (any kind will do, other than perhaps cake flour. Don't sweat it.) salt (er, forgot to measure this...maybe two teaspoons? Sumpthin' like that.) 3 Tablespoons honey 2 Tablespoons butter 1/3 cup water and RAPID RISE yeast. That's crucial here if you wanna meet the time schedule. Rapid rise, not "active". Also, make sure it's a pretty recent pack you got there. Dead yeast means no bread.
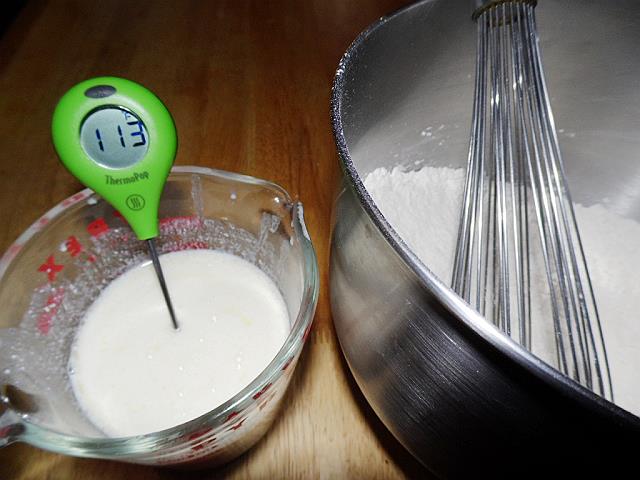
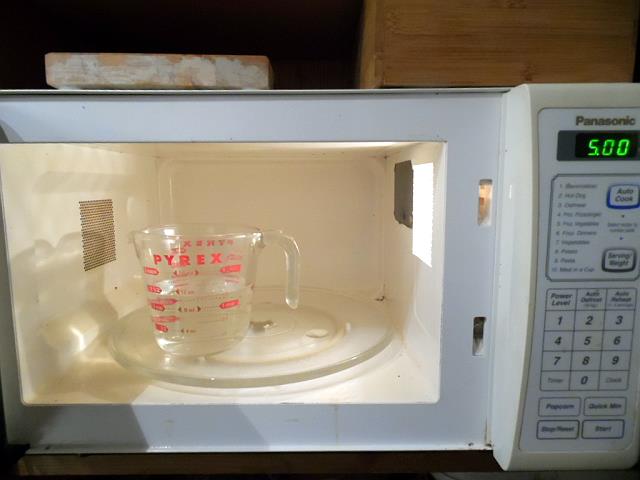
Prep: Stir the flour, salt, and yeast together in the bowl of a stand mixer. In a microwaveable measuring cup place the milk, water, honey, and butter and nuke it on high for around a minute. Long enough to get it between 110 and 120 degrees. Stir it til the butter melts completely. (No microwave? Do it on the stove. Do I really have to tell you that?)
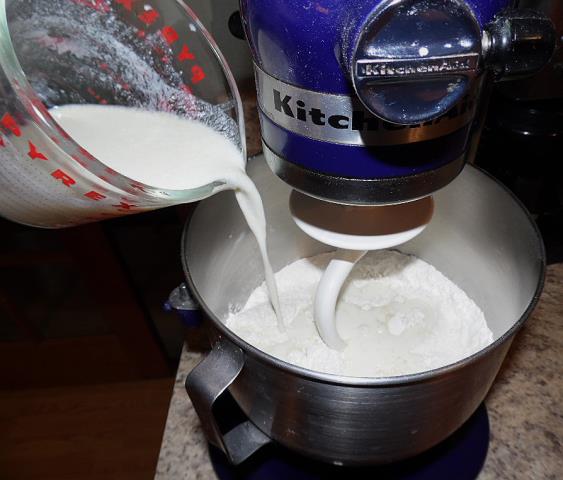
Slowly pour the liquid into the running mixer fixed with a dough hook (my KA is set on Speed 2). Little tip I discovered that helps a lot: lightly grease the dough hook before you start (I sprayed mine). That'll help keep the dough from "climbing" to the top, an annoyance that used to almost keep me from using the thing:
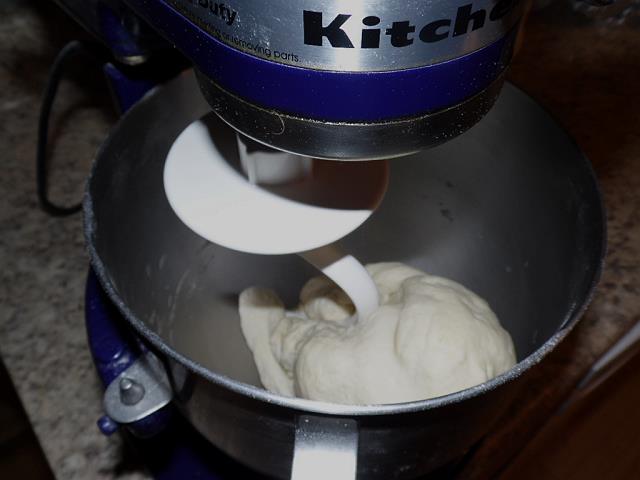
Let it spin for 10 minutes. Don't go longer than that if you can help it (the text can wait). Over-kneading is something that will ruin a loaf faster than almost anything else. Other than the other stuff that will ruin a loaf quickly also, I mean:
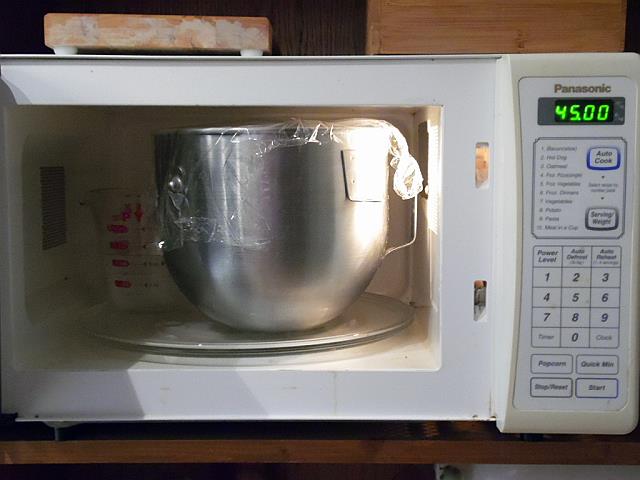
After your stand mixer has been stand mixing for 5 minutes do this: Put a microwave safe bowl or measuring cup in the microwave and microwave on high for 5 minutes. Don't open the door when it dings. Congrats - you just made a highly inaccurate, but effective, proofing box! Or at least, I think you did:
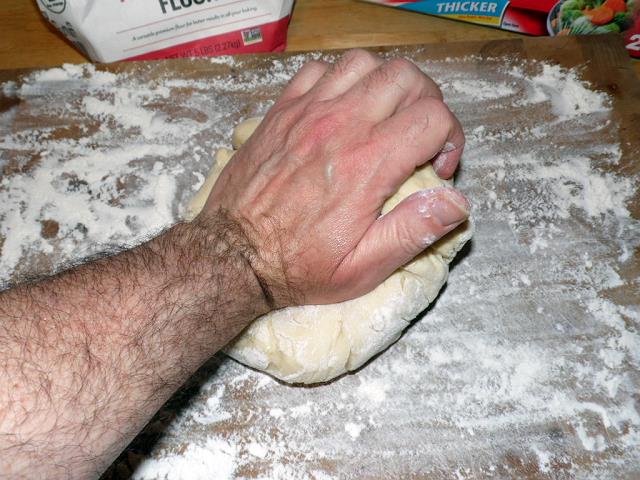
After 10 minutes dump the dough onto a floured surface (and set the mixing bowl to the side - you're gonna use it again in just a minute). Using your impressively masculine hand, knead the ball a few times. Really, just 10 - 15 good down-and-away pushes with the heel of your hand is all you need.
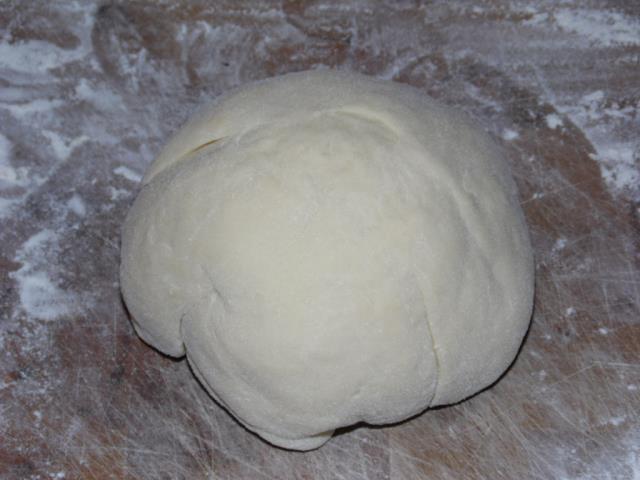
After 10 - 15 massages of your doughy ball, form it into more of a ball. Doesn't have to be exact, and don't worry that it looks like a brain, or the bottom has a bunch of seams that didn't stick together. It's fine, bub:
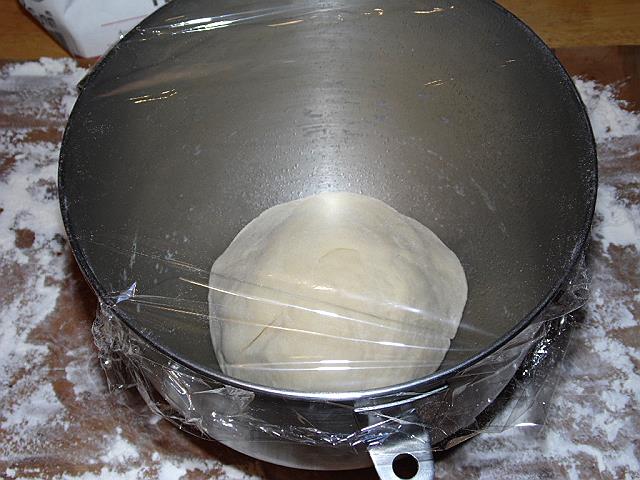
Now take the dough brain and dump it back into the mixer bowl. The bowl you have lightly oiled/greased/sprayed even though I forgot to mention it. Then cover with plastic wrap:
NOW open the microwave door, and quickly put the bowl in. Close the door, and leave it closed for the next 45 minutes. This is your "first rise". ** A WORD OF SERIOUS WARNING ** Whatever you do, and I'm not kidding around here, do not stick anything - a fork, a whisk, your finger, your wife's finger, a tribble - into the water you just microwaved. There is the possibility, however slight, that superheated (ie: heated above the boiling point) water could explode out once you introduce what's called a "nucleation site". If you want to learn more about it, here's the Snopes page, with links to the FDA warnings, engineering sites talking about it, etc. Seriously, take this one seriously:
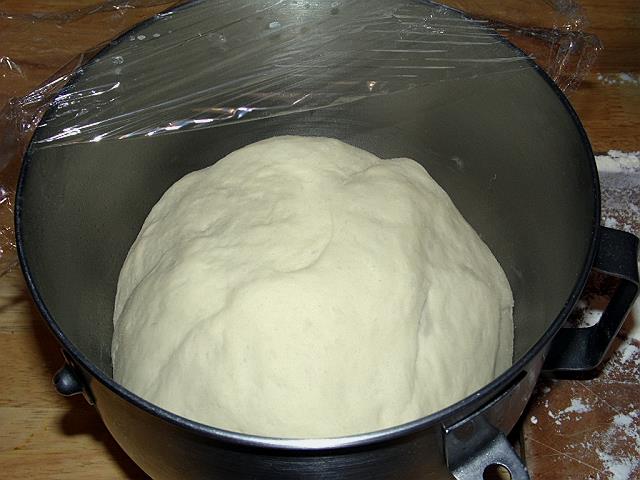
After 45 minutes, my ball got huge.That's what you want. A huge ball. If yours is not huge, it may be because of things like an unexpectedly colder temperature, half-dead yeast, or some other things that are still a mystery to me. Whatever. If your ball isn't big enough, re-heat the water for a minute or two and stick the ball back in. Check it every 15 minutes or so until it meets your size requirement. Which is "big". Go listen to that AC/DC song for inspiration.
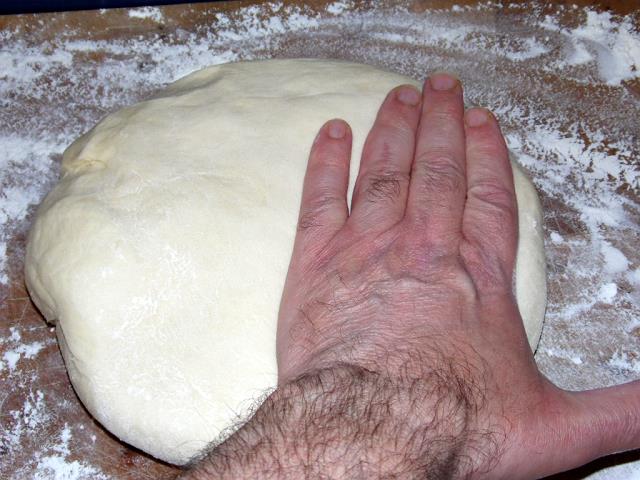
You ever heard the advice to "punch the dough down" after the first rise? Don't. Dough balls, like all other balls, don't like being punched. Just press the ball down gently. Balls like that much, much more. Seriously, don't punch your ball. Aside from the double entendre thing, you could actually cause the dough to stiffen if you slam into it here. Just remove the dough ball to a floured surface again, and start pressing down, spreading it out. You can tug it and pull it, too (yes, back to double entendres):
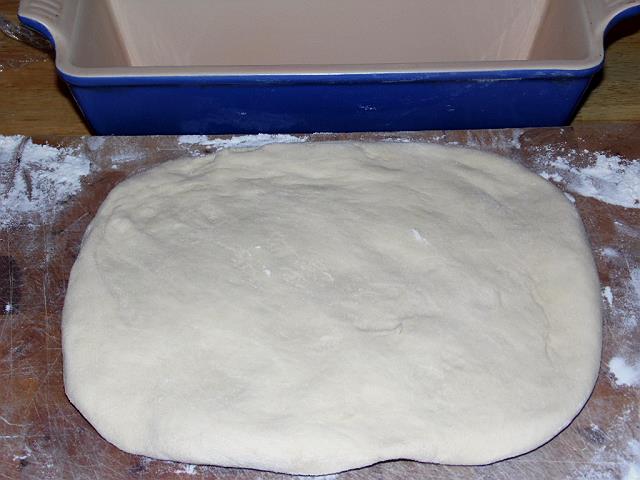
This is your goal. You want to push, tug, and pull the dough into a rough rectangle as wide as your loaf pan is long. My own trick is to put the loaf pan right there so I can tell easily. (A note here: I am using a long loaf pan, which as the name implies, is longer than your usual department store loaf pan. If all you have is one of the smaller jobs, your loaf will be shorter but higher. I prefer making longer loafs that aren't quite as tall. But don't worry, yours will be fine. Just taller. And stubbier. Stubby.):
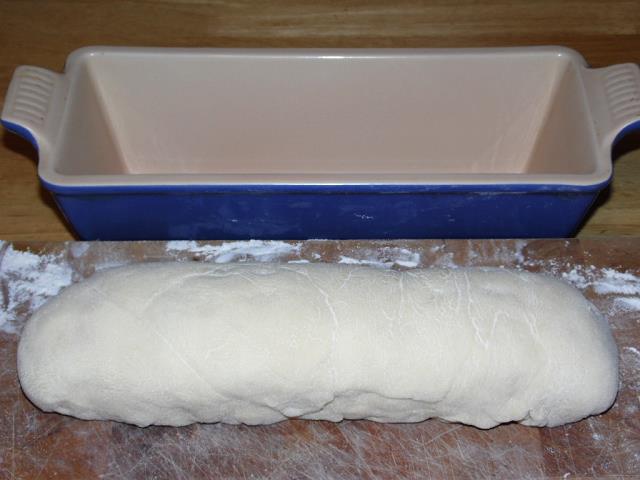
By the way, before I forget again: lightly oil/spray the loaf pan all over the inside. Don't forget the top rim and handles, because sometimes the dough rises over the rim and can stick to those surfaces. Now start rolling the dough into a tight log. If the edges start ballooning out, just pat them back towards the center. Try to make it pretty damn tight, not just two or three rotations:
Make yours look like this. If it doesn't, leave me a note and I'll mail you out one of mine. (BTW, if it's not obvious: this is seam-side down, the end pieces folded over so it doesn't look like an open jelly roll):
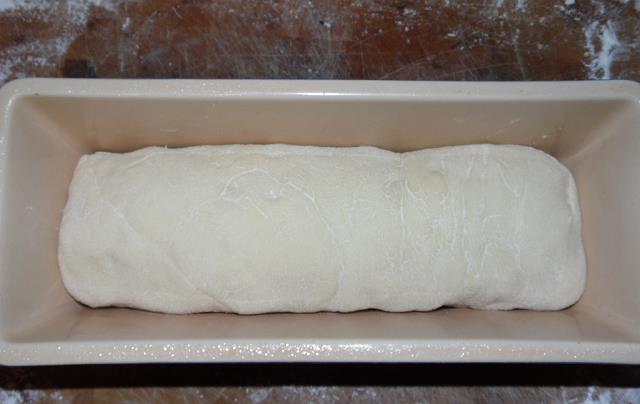
Put the log in the loaf pan. If you used the pan as a guide while you rolled, it should fit in perfectly:
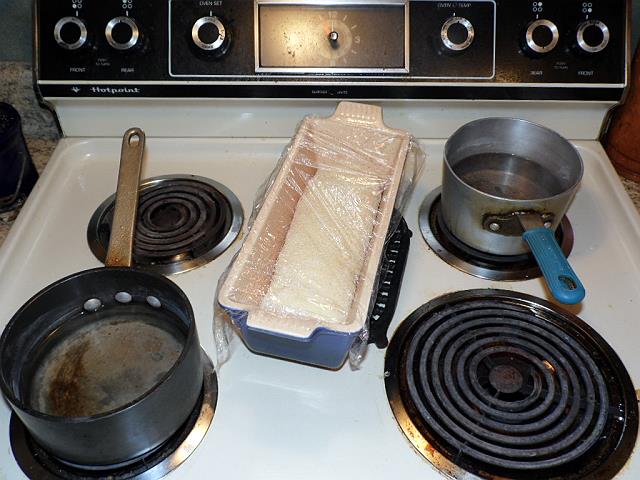
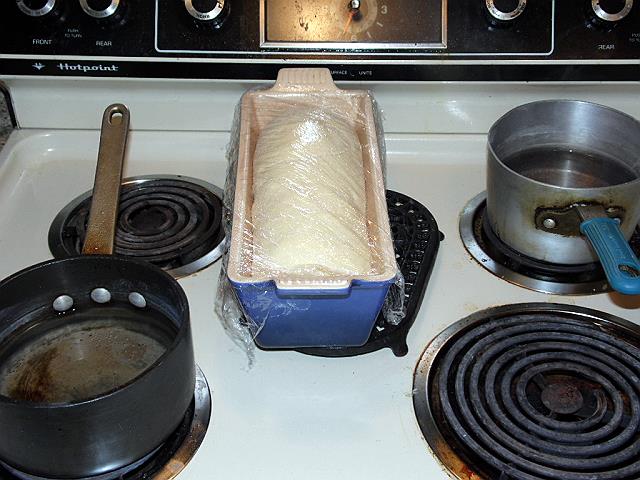
Now comes the second (and last) rise. No microwave this time. See what I did here? I've got two pots of water set on a low simmer, with the loaf pan on a trivet between them. The oven is on, pre-heating to 350(f). This gives a good temp for the second rise, which take around 20 minutes. Cover the loaf pan with plastic wrap. (BTW, do use a trivet here. The stovetop can get warm enough from the oven pre-heating to start cooking the bottom of the loaf.):
This was what I saw when my timer went off after exactly 20 minutes. It's what you want to see as well:
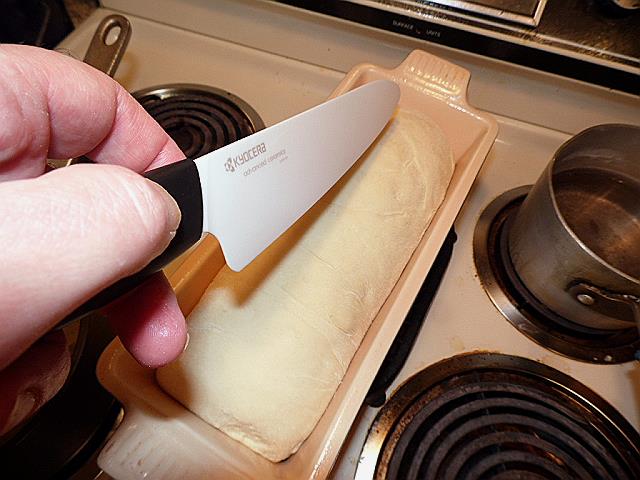
You're now ready for the final lap. Soon, all those carbs will be yours! Now take a good, sharp, thin bladed knife (or a bread "lame" if you have one, but unless you're Sally I know you don't) and hold it menacingly against the throat of the dough until it gives up the dough:
The stupid dough refused to hand over the dough! You know what that means:
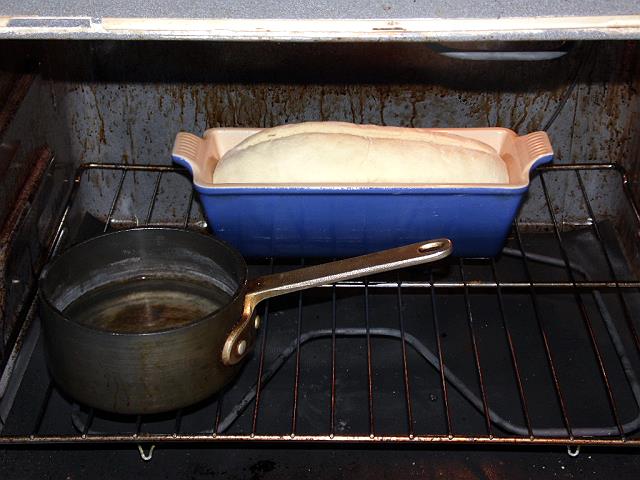
So sad. Send a bouquet of flours to the widow. Ok, now comes the cookin'. Place the loaf onto the bottom rack of your 350-degree oven, towards the back. In front, place one of those pots of simmering water you had on the stove. That will give off some moisture as the loaf cooks, and through some kind of science-y magic I don't understand, helps the crust. Or something. I dunno. Just do it:
Set your timer for 15 minutes. After 15 minutes rotate the bread pan around, so the front side now faces the back. Set your timer for 15 minutes again. When you timer goes off, check the temperature. You want the internal temp to be around 190-ish. A bit more won't hurt, but don't go under or you risk having spots of raw dough in your loaf. Like rising times, baking times can also vary a bit. Normally 30 minutes does it for me with this recipe, but this time it took 38 minutes to hit the target:
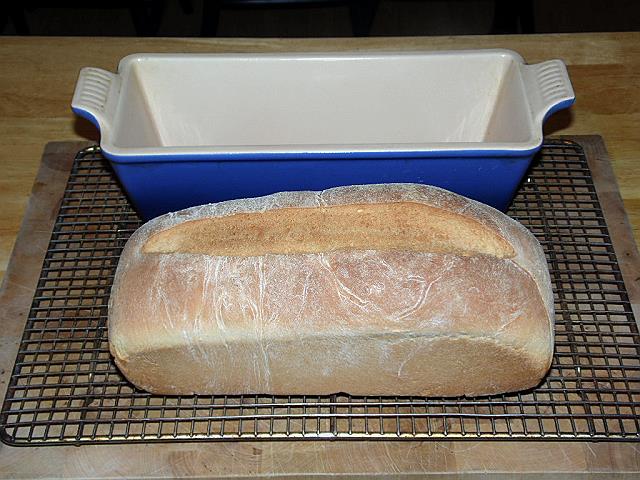
Now just turn it out onto a rack - anything that will keep the bottom elevated so it's not sitting on a flat surface and steaming will do - and...wait. You gotta wait because...wait for it...more science! As the temperature slowly comes down some chemical reactions take place inside the loaf forming various flavor compounds. If you cut into the loaf too quickly, the internal temperature will drop fast enough that it will keep those reactions from happening. It's true, I read it in a book! Anyway, just hold your horses for a few minutes, bucko. That loaf ain't goin' anywhere:
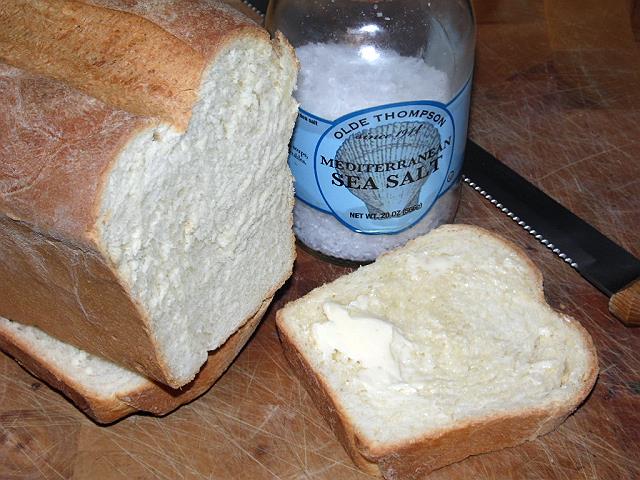
You see my loaf came out very cleanly. If yours is sticking, don't force it out by pulling the top, spraying it with WD-40, or do anything else really stupid. Just run a thin bladed knife, like a boning knife, gently along each side between the bread and the pan. I will say that with modern non-stick pans that you can get anywhere, this is hardly ever a problem, and the dark coloring makes an excellent loaf on top of that. But I like using my cobalt blue stoneware Le Creuset because...shut up. I just like it, ok? I mean c'mon - cobalt blue! Finally enough time has passed. The loaf is still warm, but not TOO warm. So…. CANNON BALL!!! Yup. Dive in. Butter and salt is the only music your bread needs to sing:
I want to call your attention to that tight crumb for a second. That's from rolling the dough log very tightly back there. If you do it loosely, well, you'll just end up in tears. In tears and eating bread with a loose crumb. So again: tight. Now let's see if my time prediction in that previous post held up, or do I suck: 1 minute 15 seconds heating the liquid ingredients. 10 minutes machine kneading. 30 seconds hand kneading. 45 minutes first rise. 2 minutes rolling into a (tight!) log. 20 minutes second rise. 38 minutes baking. Equals........ 116 minutes, 45 seconds. 1 hour, 56 minutes, 45 seconds. That's...that's less than two hours, right? It is! Yes! I DON'T SUCK! Take THAT, SallyBR! You think you're so smart just because you're so smart. HA! Finally, just to wrap things up (before I go have more carbs...mmmm....), those of you who've been reading me for a while know I've had this ongoing "bread experiment". See, I have this theory that any liquid which doesn't kill yeast can be turned into bread by adding flour and yeast to it. If you go back through my archives you'll see loaves I've turned out using melted ice cream, various soups, Earl Grey tea, Korean ginger-cinnamon drink, sauerkraut, etc. So far, I have not had one failure. And this is the base recipe I use. So if you want to try your own bread experiment, follow along with what I did here, but substitute your own insane liquid choice for the water/milk combo. And let me know how brilliant I am in the comments (or how much I suck, depending). There ya go, fellow blogger who shrilly requested this. I hope you're happy. Or at least, shut up for a while. NOW the next time I come back, it'll be with stories and jocularity. Unless somebody harangues me for something else again. Please don't. Just loaf contentedly until I get back. Ciao! . .

|